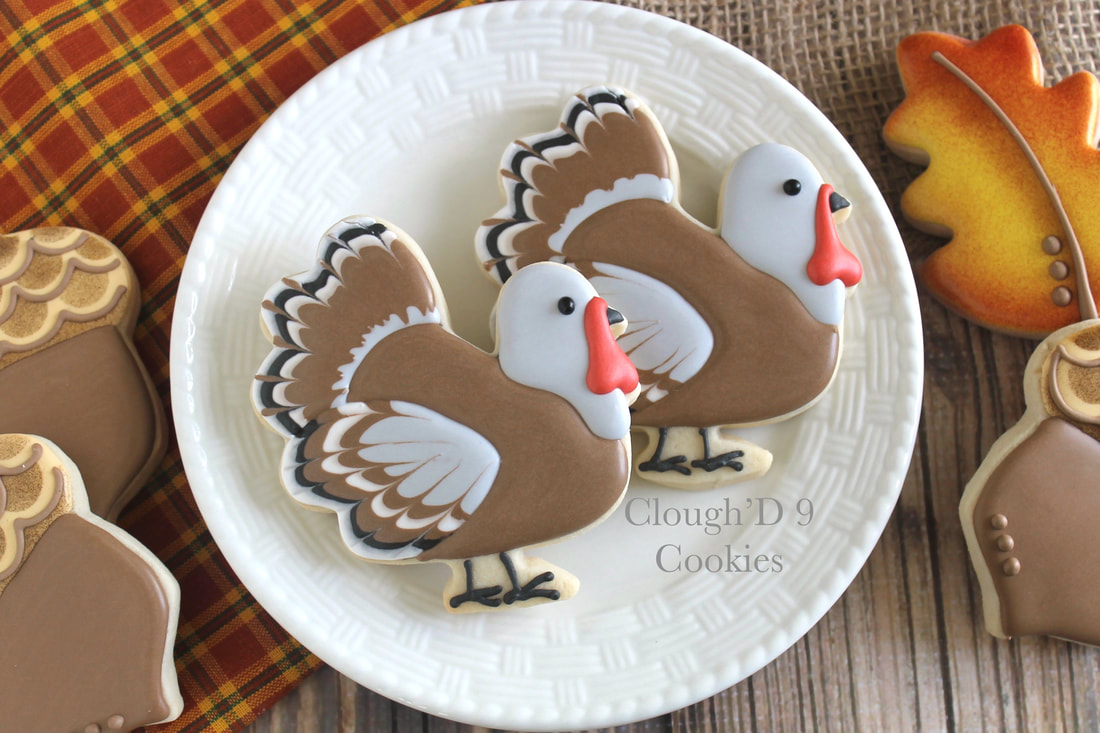
 When I was growing up, Thanksgiving in my house was the traditional roasted turkey feast, from the juicy bird to the jellied cranberry sauce from the can (My dad insisted on having the whole cranberry stuff too- blech!). Aside from my mom's sweet potato pie, my absolute favorite part was the STUFFING. Now this term is actually a little misleading because my mom never put this seasoned bread concoction actually inside the bird, but rather in a pan that was baked until crispy and brown and absolutely delicious. So I guess "dressing" would be the more appropriate term for it. But in my house, it was "stuffing", and that's exactly how I felt at the end of the meal. Stuffed. Ever since I began my cookie journey, I've made turkey cookies to accompany the pies on the dessert table. So before we all get stuffed for Thanksgiving, let me share with you how to make these turkeys! What you'll need: * turkey cookie shape (mine is from this Ann Clark cutter) * royal icing (in a 20-second consistency) of the colors: brown, white, black, gray, red * black sugar pearls (optional) * scribe tool or toothpick * food marker 1. Use a food marker to mark the location of the tail, wing, and neck. 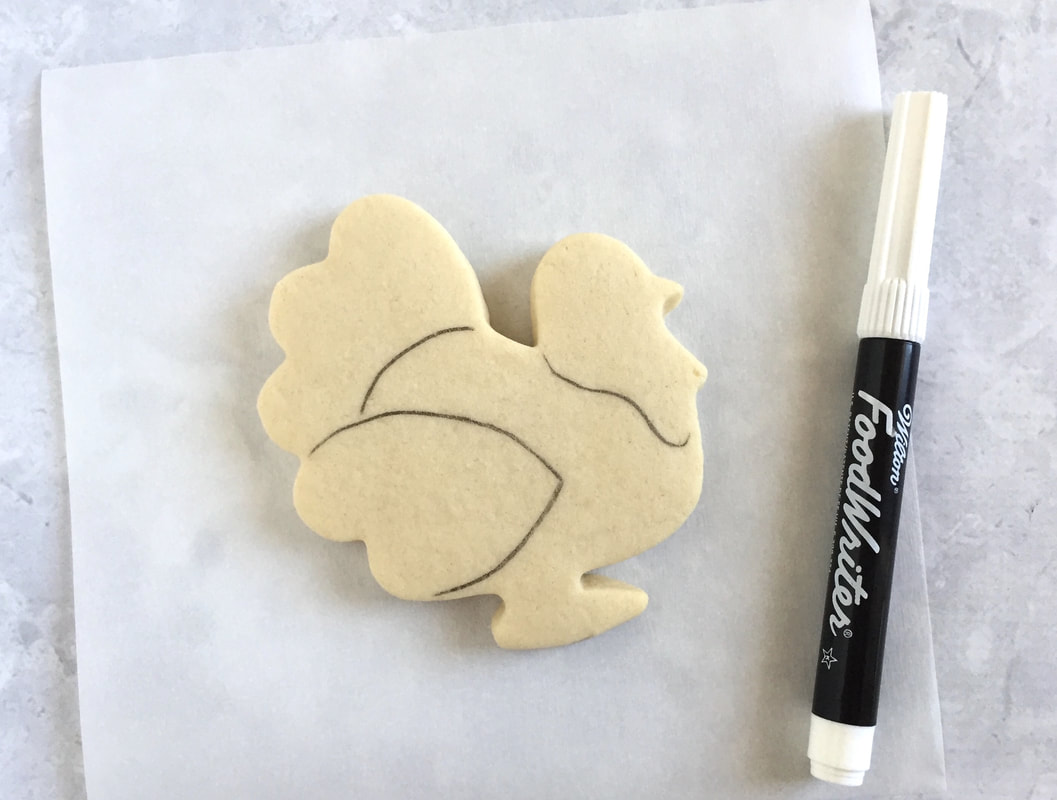 2. Starting with the outer edge of the tail feathers, pipe a line of icing. Immediately pipe the next icing line right next to the previous icing line. Continue with this wet-next to-wet technique. 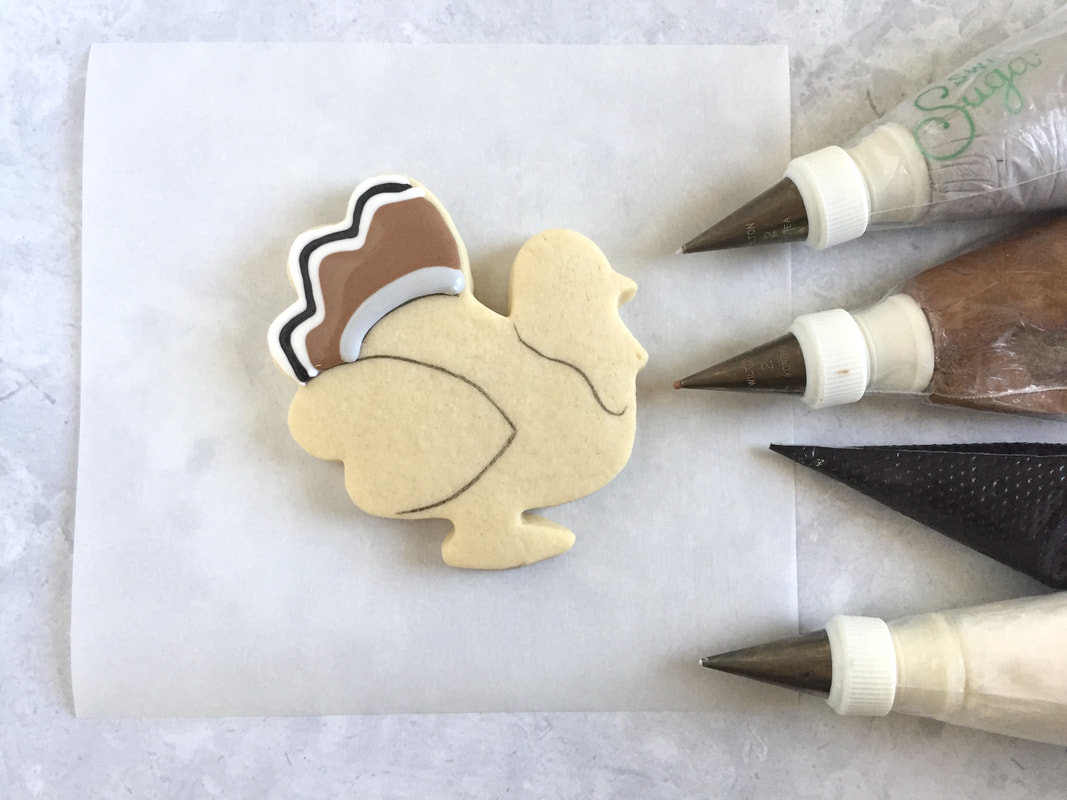 3. Immediately take the scribe tool or toothpick and drag it through the icing, starting at the edge of the feathers and working your way to the base of the tail. 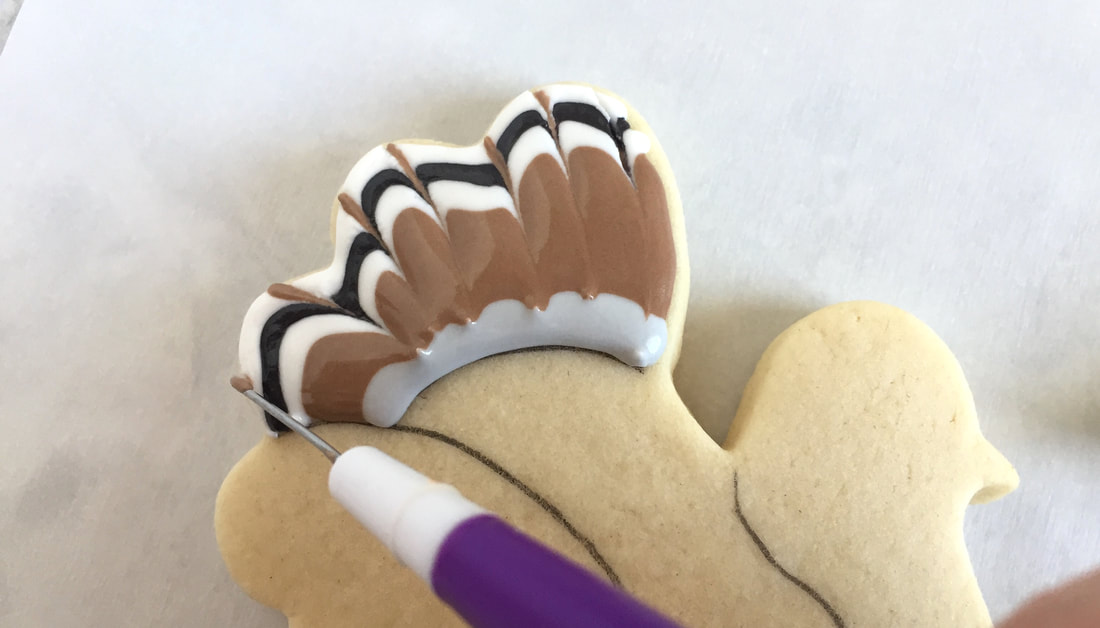 4. While the tail feathers are starting to dry, use the gray icing to pipe the head of the turkey and drop on the sugar pearl eye (if you don't have black sugar pearls, just pipe an eye once the head is dry). Use some black icing to add feet. Truthfully, you could use all sorts of colors for the head of the turkey, including brown, red, or even blue! Yes, blue! If you're feeling brave, go ahead and do a google image search of "turkey head". Ugliest.things.ever. LOL! Let these sections dry for a bit. 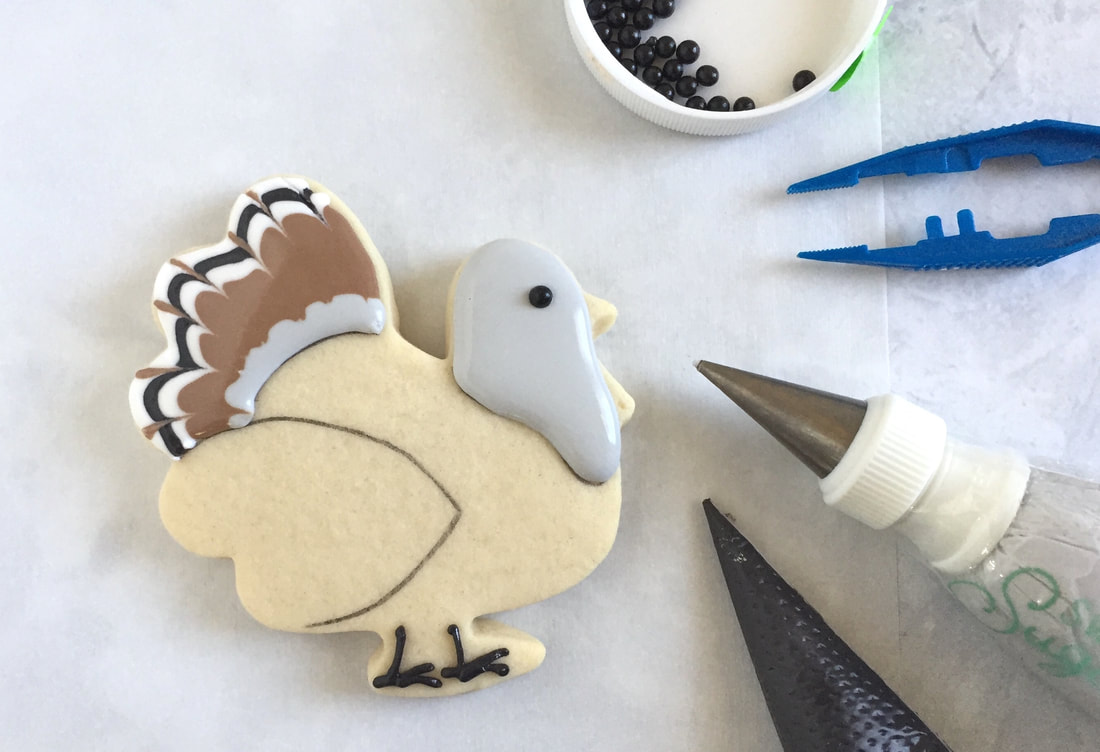 5. Use the brown icing to create the body of your bird. Use the black icing to pipe a tiny beak. Let these sections dry for a bit.  6. Time for the final details! Pipe the wing using the same wet-next to-wet technique as you did the tail. Once again, drag the scribe tool or toothpick through the icing, creating the feathers. Grab the red icing and make the wattle. You're done! 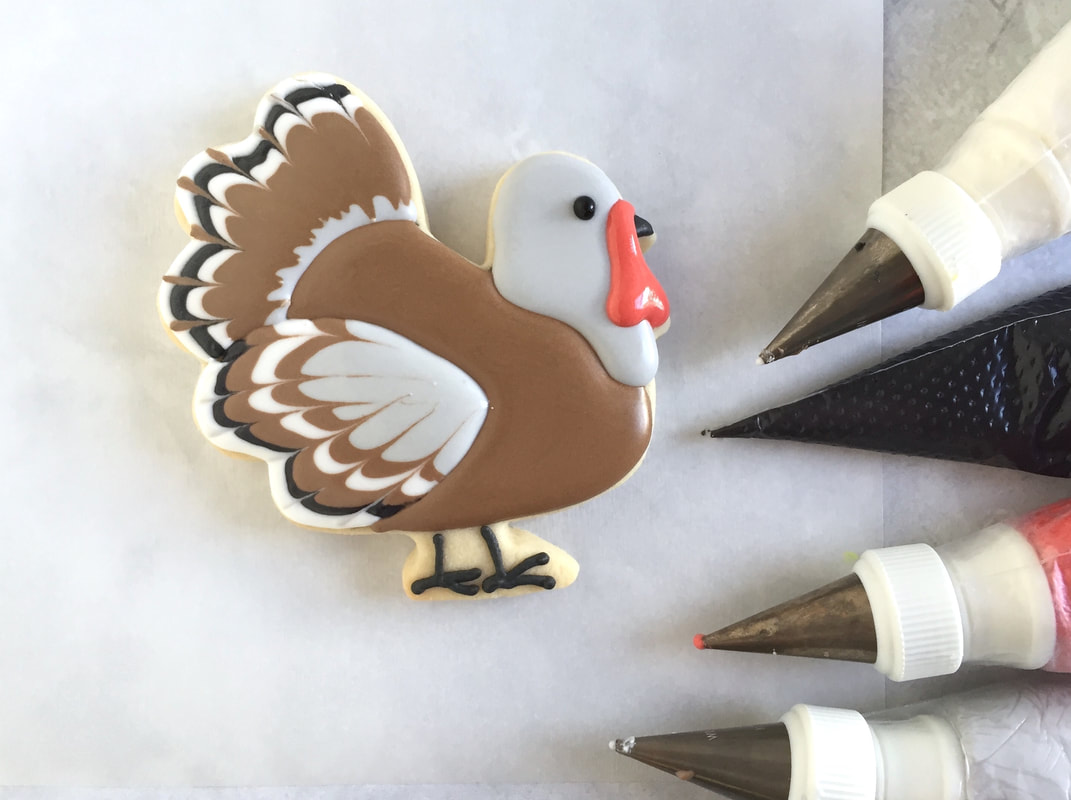 Add in some beautiful fall leaves or acorns to keep your cookie turkeys happy, like these acorns made from this Ann Clark cutter! 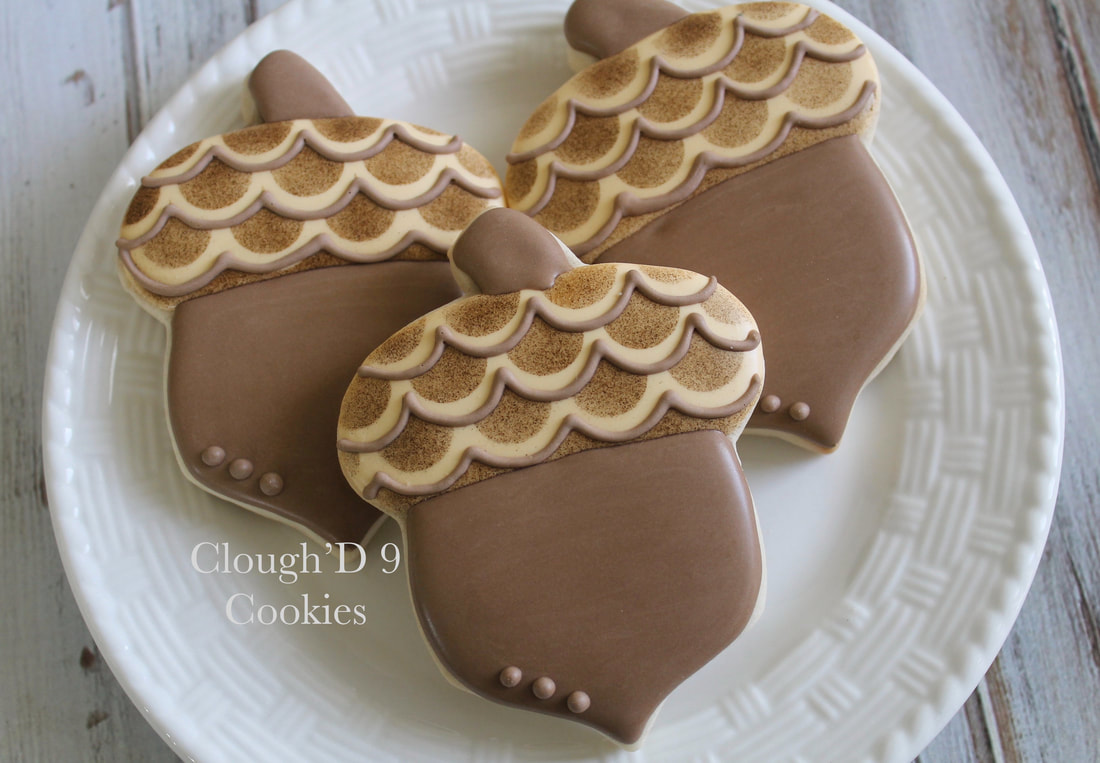 Or even add in some pilgrims, like these made from a turkey cutter, designed by LilaLoa (also found at Ann Clark)! You can see some other pilgrim cookie designs from different cutters here and here! 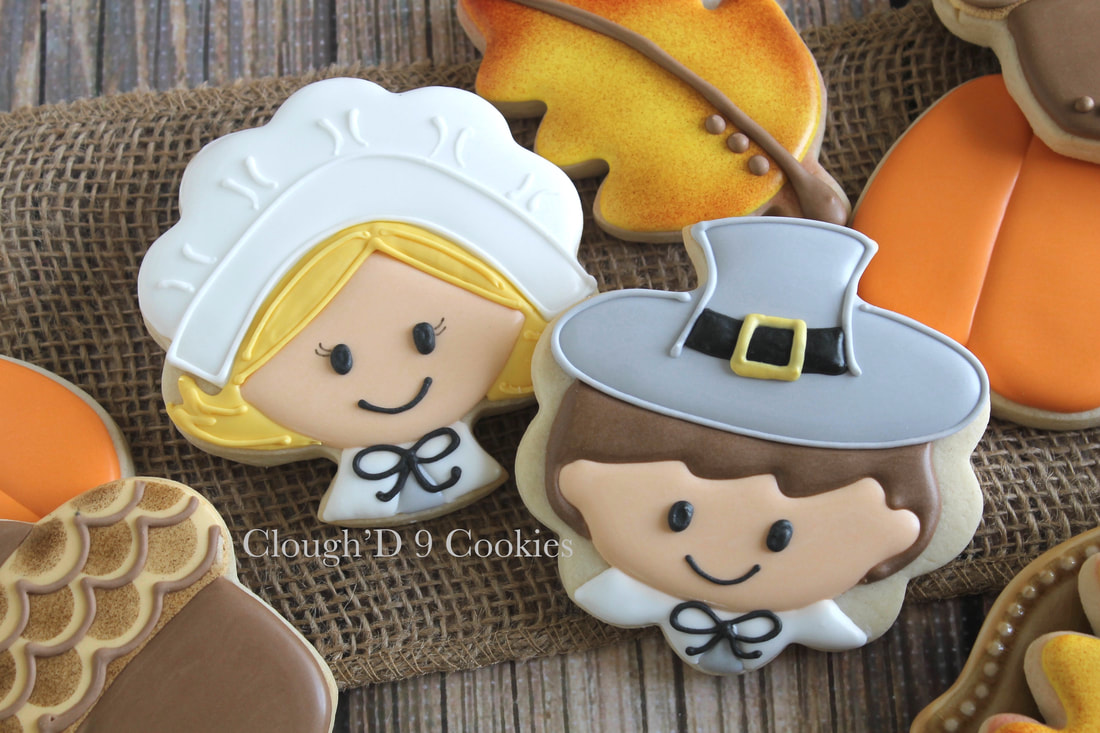 Have a wonderful Thanksgiving! 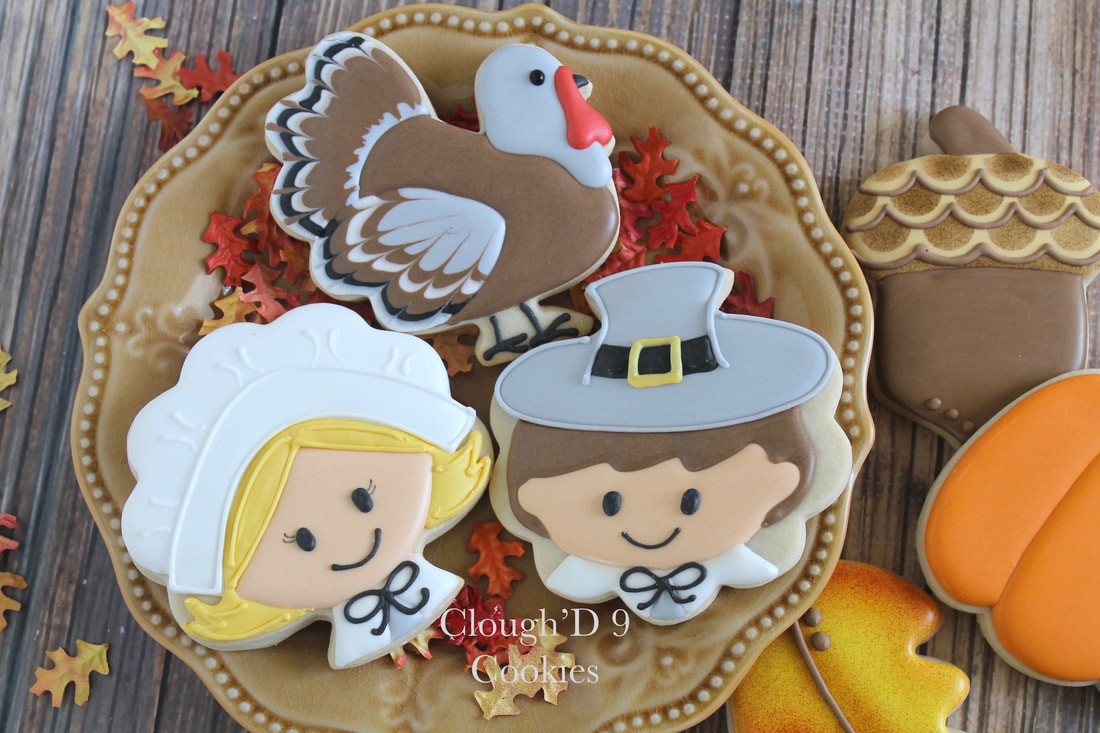
Darlene
11/7/2017 03:57:26 pm
Love these. It's a slightly different color combination. Thank you. Comments are closed.
|

AuthorI'm Amy. Wife, Mom, former science teacher- and now full time cookie baker on Maryland's Eastern Shore. Pull up a chair and we'll create! I'll bring the coffee- maybe Mike (The Cookie Widower) will make it for us. Categories
All
Archives
May 2021
|
 RSS Feed
Copyright © 2024 Clough'D 9 Cookies *All rights reserved*